
When we were in Kauai, we stopped for breakfast at the Ono Family Restaurant one morning in Kapa’a. In some sort of weak attempt to look like a local, I ordered the Local Girl Omelet. The Local Girl Omelet is not your ordinary omlet, for one it was filled with brown fried rice, but to top it off it was also filled with kimchi. I had never tasted kimchi but I’d heard a lot about it, so of course I had to try it. Kimchi, in case you haven’t heard of it is basically a type of Korean Sauerkraut. But as I found out kimchi is oh, so much more than sauerkraut. The omlet combination was fantastic. I’m not a huge omlet fan. They always are greasy and leave me feeling too full and icky feeling afterwards. But this omlet didn’t leave me feeling that way at all. Maybe we can attribute that to the kimchi. I don’t know. But I do know that that taste of the kimchi…that sweet, spicy, salty, crunchy taste haunted me for weeks afterwards. I wanted more!
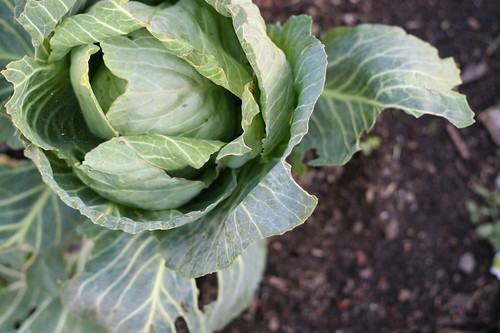
Before we had left on our trip I received a copy of Nourishing Traditions from the library, so when we got home I started browsing through it. You can only imagine how happy I was to see a recipe for kimchi in the book and it was so easy to make! And lucky for us, Napa Cabbage everywhere in the Farmers Market right now, so we grabbed head and set home to give this kimchi recipe a go.
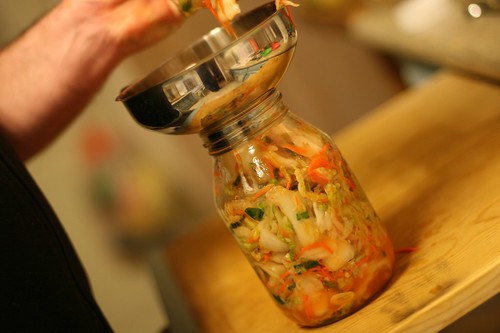
If you are used to canning, making kimchi is really going to throw you. Kimchi is made by a process of fermentation. A process that goes so against the process of sterilized canning that it will make you wince a little bit, as did we. You don’t sterilize the jar at all. You don’t boil anything, you don’t use a virgin can lid, you don’t wait for the top to pop. You just put a bunch of cabbage and other vegetables in a jar with some salt and some whey*, pound it down with a spoon handle and let it sit….at room temperature…for days. Are you scared yet? And it may bubble, but that’s okay. And some white film may form at the top (ours didn’t however) and that too is okay. After three days of sitting on your shelf you are ready to eat it and put it in the fridge. I won’t be ashamed to admit that we were a bit scared for our safety to try it. But try it we did and we’ve been adding it to everything now.
Lucky for us we came upon this recipe first because when you really start to research about how kimchi is actually made by the Koreans, the process becomes a lot more involved. So involved that we probably wouldn’t even have attempted it. But since we haven’t had much kimchi in its pure form, we are happy with our simplified method. What we did learn though that kimchi is one of the most healthy foods in the world! No really, many different people claim that.
The reason it is so good for you is because of all of the good bacteria (lactobacilli) that proliferate when it is fermented. These lactobacilli are found on the surface of all living things but they are especially prolific on the leaves and roots of plants growing in or near the ground. The by product of these lactobacilli is lactic acid which not only preserves vegetables and fruit perfectly, but also promotes the growth of healthy flora in the intestines. Kind of like yogurt.
Back through history most cultures used some sort of fermentation to preserve their food. In fact anything that you hear of today as being pickled used to actually be a fermented item before mass production. Once industrialization took place and fermentation started to happen on a grand scale, they found that the results often varied. So they went in and used vinegar instead of letting the fermentation happen naturally and they also had to pasturize it, which like milk, kills all of the beneficial lactic-acid producing bacteria.
Luckily fermentation is really easy and fun to do at home. Basically you just put a bunch of vegetables or fruit in a jar, pound them for a few minutes, add in any herbs or spices you like and salt. Salt will preserve the produce until the lactic acid starts to get produced. If you add whey it will just guarantee your results.
So here is the recipe we used, again from Nourishing Traditions. It calls for Napa Cabbage, but I think on this next go around we might use regular cabbage since we have it growing. I’ll let you know how it goes. And I’m excited to learn about this fermentation method. In fact I might try more fermented or pickled veggies to preserve the summer harvest this year. In fact I might have to add this book to our bookshelf: Wild Fermentation: The Flavor, Nutrition, and Craft of Live-Culture Foods
- 1 head Napa cabbage, cored and shredded
- 1 bunch of green onions, chopped
- 1 cup carrots, grated
- ½ cup daidon radish, grated
- 1 tablespoon fresh grated ginger
- 3 cloves garlic, peeled and minced
- ½ teaspoon dried chili flakes
- 1 tablespoon sea salt
- 4 tablespoons whey* (or use additional 1 T salt instead)
- Place vegetables, ginger, red chili flakes, salt and whey in a bowl and pound it with a wooden pounder or a meat hammer to release juices. Place them in two quart sized glass jars and press down firmly until all the juices come up to the top and cover the vegetables. The top of the vegetables should be at least an inch from the top of the jar. Cover tightly and keep at room temperature for about 3 days at which time you can put it in the fridge or cold storage.
- *You can get whey by draining a quart of yogurt (make sure it contains the good bacteria-we use Pavels) through a clean dishtowel for a few hours. If you do this overnight you'll end up with more than 4 tablespoons, but it will keep in the fridge for up to 6 months. And you'll also end up with yogurt cheese as a by product, which is delicious and makes a great alternative to cream cheese.
Are you a kimchi fan? Have you ever fermented anything? Do you have any tips for me and my new obsession?


We do a lot of fermented foods in our house. In fact, they make up a good chunk of our diet. Most recently, I fermented some meyer lemons and they make a delicious condiment. When I do kimchi, I skip the whey and just use salt.
Thanks for the meyer lemon idea! I have two meyer lemon trees!
my mother and grandmother, and i have always made our sauerkraut that way just salt and after nine days its ready,
I followed the Kimchi recipe just as it says and only used salt. It tasted so salty and bad it can’t be eaten. It’s going in the garbage!
you should watch this to know exactly what you are doing wrong. http://www.maangchi.com/recipe/easy-kimchi
I am extremely allergic to hot peppers, but love kimchi – can it be made without hot peppers?
Definately check out Wild Fermentation as well. I LOVE the book and the author. I just started fermenting my own food and drinks last summer after reading Wild Fermentation and fell in love with the entire process. In fact, making our own fermented saurkraut is the main reason we are growing cabbage again 🙂 It stayed yummy and crunchy for MONTHS after cabbage harvest was over. I ended up adding it to everything! Love kimchi too! I also started making our own rejuvelac after reading that book made is so fun sounding and my 2.5 year old and I have been hooked ever since. Making it has also enabled me to stop spending a fortune on quality probiotics. This year I want to expand to other home fermented foods as well. So fun! And the science behind how good it for our bodies is so interesting to me.
My uncle used to be married to a Korean woman many years ago when I was just little. I don’t remember much about her except that her name was YouMe (spelling is probably way off, but it really was pronounced like YouMe) and I would hear her talking on the phone in Korean. She got my mom and aunts hooked on kimchi, the really hot, authentic stuff. My mom loves it and has it every once in a while (she usually buys it). I have never braved a taste. Maybe I will sometime.
So I pounded my kimchi but there is a minimal amount of liquid, no where near enough to cover it…am I going to have rotten cabbage in 3 days?
Hi Tricia, I’d go ahead and let it sit for 3 days and see how it is then. We’ve only made the kimchi once so I’m far from an expert. But I did read that if it does go bad, you will most certainly know it. I guess it will be so putrid that there would be no way you’d put it in your mouth. Let me know how it goes!
You can make brine with salt and water (1 tsp per 1/2 cup???) added to cover. I would add that it should be weighted to hold the vegetables under the surface of the liquid. Use a wide-mouth quart jar and find a skinny jar that fits inside the neck that you can fill with water and use as a weight.
ooo, the store here has cabbage 5 heads for only $1…for that price and the fact that I have the rest of the ingrediants on hand I may as well be brave and try making it! Also a good use for the whey I drain from my homemade yogurt. yum!
please let us know when you experiment fermenting other things
Hi all. I’m a kimchi addict too!
As a tour driver, I get to try all kinds of food. I would NEVER have tried korean otherwise. Anyhow, one of the most fabulous fermented foods I have tried, and am right now trying to make myself is, fermented green chili peppers. Also known as green chili kimchi. It is important tu use a mild chili or it is just too hot to eat! there is a fairly good recipe at http://www.desertmodernism.com/blog/korea/.
Enjoy!
Just finished my first batch of kimchi. I had a question. We let it ferment at room temperature for 5 days (68 degrees or so), and now we are ready to eat. Its smells wonderful, but there is a bit of a scum over the top. Should we just dump it and not take a chance?
I’d skim off the stuff at the top and go ahead and refrigerate it now. From what I’ve read in Wild Fermentation, a little top scum is nothing to worry about. Strange to think that’s okay, I know, but that’s what I read!
Can anyone provide qualified information on canning for longterm non-refrigerated storage of kimchi?
no way baby… kimchi is a process of roting and will contuny to brake down. you may arrest the process with vinegar…. but you lose the bennifit of the fermentation… eat it…leon
I think that canning it would be counter to the goodness but probably not too much. Kim Chee at the store is canned and still bubbly. The recipe that I have gone off from is M. Jaffrey World of the East Vegitarian Cooking. She has several picles in there as well. I have also heard that the whitish scum on top is an ok yeast. Right now I have some cucumber kim chee which has the scum which I will cap and refridgerate unless I get a little braver. Maybe I will leave one pint out for another day. I had a batch from a couple of weeks back that came out ok and I have a napa batch with some sweet and hot pepers in it rather than the dry peppers. Garlic and ginger are key to good kim chee at least for me. I may try the method of digging a hole out back and burying a bottle in the ground below the frost line with someleaves, etc and let it sit till the spring. The Korean way is with large clay vats in the soil for long term storage.
Store bought kimchi needs to be fermented longer. I think you should wait at least a month. I will warn you it does have a strong smell, the stronger the smell the better for you.
It prevents flu and colds, I never had a flu or cold when eating kimchi regularly. I only caught the cold or flu when I stopped eating kimchi.
You can make kimchi without the hot pepper flakes.
Storage of Kim Chi is not a problem. The Korean people make Kim Chi when Napa is in season, and they make enough to last till the next new Napa is ready. They bury it in earthenware pots in the ground and dig it up as needed. The word to the wise here tho is: It gets pretty ripe. Cabbage that has gotten really ripe has a skunk like smell, but is still edible, if it is Kim Chi, but will give you very bad breath. Mostly when the Kim Chi has gone sour (fermented till it tastes bubbly) it is used for cooking, to make Kimchijigae (soup) or Buta Kimchi (stir fried pork and kimchi) which are both delicious. Cooking removes the alcohol and smooths out the flavour. Fresh Kim Chi is only really fresh for up to four weeks.
I used to like vege when i was young.but now i don’t like vege. Ever since i moved to my current country where i live now, i started to like kimchi.My friend took me to a korean restaurant and at first kimchi taste really weird for me.but after went to some other korean restaurant i started to like kimchi.And right now it kinda become my habit to eat kimchi in almost of my meal. and i usually buy kimchi in korean market everyweek.Iam thinking of making a home-made kimchi.hopefully i can succeed on making my home-made kimchi =) thanks for the recipe..
Like another poster I also skip out on the whey and use just salt and time. You can ferment any vegetable using this method. The lactobacilli is naturally occuring on the outside of the vegetables and begins reproducing.
Looks delicious!
I just made my first batch of kimchi a couple of days ago. I used the refridgerator since I started with the juice left over from kimchi made by a Korean friend. I make mine mostly with just carrots since I that was the kind I had many years ago. It’s bubbling and working even in the fridge.
i’m making my first kimchi now! it’s been sitting for 24 hours and is now bubbly…the fact that it’s 85-95 degrees every day must help. i have become addicted to kimchi this year (i live in japan), but i’m hoping to replace the storebought stuff (whose ingredients i can’t easily read) with my own. i admit i’m also a little nervous to try it, but maybe tomorrow morning. at least it seems to smell right. i also used only salt, and fyi…blending up half an onion or so with a 1/2 cup of water can help get enough liquid to cover the vegetables. i used this well-written recipe: http://www.drbenkim.com/how-make-kim-chi.htm
My roommate is making kimchi right now, and as a home canner, his method had me completely freaked out. Your article was just what I needed! Now I’ll be sure to give it a try 🙂 Thanks for posting this!
You should salt the cabbage and soak in salt water for 4 hours or more before stuffing the leaves with the ingredients. This causes the cabbage to wilt and helps in the fermentation process. I also like to use salty shrimp, pureed onion, and fish sauce on top of what you use for your ingredients. It really adds to the flavor of the kimchi.
While I’m sure this recipe produces a very nice dish, it sure is a strange kimchi recipe that’s not very traditional. (Whey?!? The cabbage comes with all the lactobacillus bacteria you need.) I’ve had 100% success, with no hints of scum or spoilage, with the kimchi recipes from http://www.maangchi.com. (If you like Korean food, that site is a goldmine.)
I make a whole bunch of it and put it directly in the fridge to slow fermentation. I then take small amounts out of the fridge and leave them at room temperature to quickly ferment as desired.
I also use far, far, far more ginger in mine than the recipes call for, just because I love ginger.
It’s totally OK for the kimchi to not be sitting in juice when you start it — the spice paste in a traditional recipe has enough salt (in the form of fish sauce) to draw out plenty of moisture from the vegetables.
Maangchi has the best kimchi recipe! I make this: http://www.maangchi.com/recipe/easy-kimchi – it makes tons. We do a vegetarian version, using soy sauce and lime juice instead of fish sauce (and no squid). I have a crock bubbling away right now.
Okay, so I have a big question.
I really want to make my own kim chi, but I am not that familiar with jarring and pickling, fermatation in general. I can get all the ingredients without a problem. The issue I have is Room Temperature, 68 Degrees F, since I live in South Florida. Another concern I have is how does Humidity factor into all this. And next question is, when jarring, you leave 2 inches clear, I get this, as it will expand as it ferments, but, what about the trapped air inside? Do you need to remove the Air? or does the Air trapped inside create a vacuum for fermentation process.
I know when I make my Grandfathers Salsa down here, its best to let it age at room temperature as well, but due to temperature and humidity, I will only leave it out of the refrigerator for only like 10 hours at the most.
Please, any help when dealing with Tropical Climates regarding fermentation process would be very helpful. 68 degrees F tells me its not a humid climate at all.
I am obsessed with kimchi…
It all started with a local restaurant’s homemade soy burger – topped with kimchi, pickled jalapeños, arugala, cheese, and sriracha. You must try it.
So after purchasing copious amounts, and having crises when I run out second only to when I run out of coffee, I am ready to make my own. My question is: use the whey or use the extra salt?
nice, cant wait to try
I’m going to try this recipe but change a few ingredients so we use what we are growing. We are growing red cabbage and red radishes so I’m going to switch them in. Do you think it will work?
Follow these instructions for canning kimchi. Its the same process as fermenting and canning sauerkraut.
oops! forgot the link http://southernfood.about.com/od/canning/r/bl90718h.htm
Make sourdough starter from fermented green grapes. http://thisdamecooks.com/2011/02/sourdough-star…m-green-grapes
Ginger Beer is another simple fermentation process. Just ginger root, sugar, water and a pinch of brewers yeast. Takes 12 hours to carbonate. http://thisdamecooks.com/2010/10/how-to-make-yo…wn-ginger-beer/
“You just put a bunch of cabbage and other vegetables in a jar with some salt and some whey*, pound it down with a spoon handle and let it sit….at room temperature…for days.”
I feel like this is not kimchi but may be something else. When you buy kimchi from a store, it’s not a variety of vegetables. Napa cabbage may be all that’s in there and kimchi is usually extremely spicy.
You buy a kimchi fresh, made with anchovy and a lot of other ingredients, and leave it to ferment. The fermenting makes it much more spicy and is used for kimchi chiggae (stew) and other foods.
Thank you for all the wonderful recipes and ideas you have in your Sonoma garden! I’ve made your lotion and soap and am now going to try your kimchi! (And, also get Wild Fermentation.)
Hi! Love the site! Just tried your recipe for the first time. Having used Daikon before, I squeezed all the liquid out before adding it. There was A LOT of liquid! The thing is, there wasn’t that much liquid when I put it in the canning jars. Each one had way more than an inch of space and very little liquid. Is this ok? Help, please!!!
While it is fermenting, I check my kimchi every day. It is always submerged and covered by a towel. However, after 10 days, I discovered a large dead fly in the brine. Will my kimchi be OK or should I toss it and start over?
Speaking of Hawaii, I just got back from Hawaii (Maui and the Big Island) about two weeks ago and I read a kim chee article in the Hawaiian airlines’ magazine and it reminded me about KC. I bought some at Rainbow Grocery in SF, but now I’m almost out. Luckily, I found this recipe and will be making it after I’m done with my upcoming “food week”.
I’ve made other fermented veggies, coconut kefir, milk kefir, and a soda. Some of these I made in K. Ruby Blume’s classes in Oakland. Thanks for the recipe and take care.
If you raise Cucumbers, you’ll always miss some and they will get extremely large, you can make fermented Dill Pickles with them and they are delicious.
You will need at least a 5 Gallon stoneware crock, a wooden lid that fits within the crock and a heavy weight. My Grandmother used a large grindstone rock that she found on the farm where she lived.
Clean the crock (no Dirt) and boil the rock and the board cover in a large pan, let cool.
Wash the cukes to remove the dirt, no scrubbing.
place as many Cukes side by side in a single layer as the crock can hold.
Add a 1.5-2″ layer of Dill, several cloves of Garlic and 1/2 cup of salt.
Repeat until there is just room enough for the wood lid to fit into crock about 2″ below the top.
Add cold water to the top of board and place rock on top to hold the board in the water. Let ferment for several days in a cool place. Remove any scum that forms on a daily basis. In about a month you can enjoy your fermented Garlic Dills, the large kind.
I just found your website while looking for a ‘recipe’ for homemade lip balm. My son doesn’t like ‘regular’ lip balms with all the chemicals and additives…says they dry his lips. After looking at the lip balm, hand lotion, almond milk…etc (will be busy for a while trying these!)…I read the kimchi recipe. LOL – I haven’t had kimchi but have heard of it…but b/c you mentioned you’d like to try other ‘fermented’ things, thought I’d tell you how to make ‘torshi,’ which is pickled turnips, eaten in Egypt. Very easy to make and I LOVE them. I usually make them in a gallon jar.
TORSHI
2 T salt
3-4 cloves of garlic – whole and unpeeled
Peel 2 medium or 1 large beet and cut into 4-8 pieces
Peel and cut into steak-fry sizes, enough turnips to fill the jar, packed tightly.
Put the salt in the bottom of the jar; add 1-2 cloves of garlic, and 2-3 pieces of beet. Put about 1/3 of the turnips, another 1-2 cloves of garlic, 2-3 pieces of beet. Repeat this process so the beets & garlic are mixed in withthe turnips. Pack the turnips tightly into the jar. Fill the jar with water – I use tap water, but if your water’s highly chlorinated, I’d use bottled water – trying to make sure all the turnips/beets are under water as much as possible. Put the lid on the jar. If your jar has a metal lid, I’d recommend putting a large plastic bag – or plastic wrap – across the top, then screwing the lid on. Once you put the lid on, shake the jar well. Leave it sitting on the cabinet, shaking it up about 2x a day. After 3-4 days, taste the turnips and see if they’re getting ‘pickly’ tasting. In the summer when it’s warm, they pickle quickly. If it’s cold, it takes longer. After a week or so, they should be pickled sufficiently, then you can move them to the fridge.
I eat them plain, in a sandwich, with meat/chicken…whatever you like, try them with it.
Thank you for your information on how to make kimchi. So far my experience with buying kimchi dishes. but now with a recipe that you wrote I want to learn to make kimchi food: D.
I once had a Korean girlfriend and she got me hooked on Kimchi. I loved the taste but never knew the nutritional value of it. Today I am helping a good friend beat breast cancer that metastisized to other parts of her body and now on more chemo. I was going through some books I had about proper foods to fight cancer and came across fermented vegetables.
I googled some stuff and your page came across. I like your recipe and will try it. I hope i will be able to find all the ingredients in Dubai, where I am temporarily living. Thanks for sharing your recipe. Fabio, House of Chocolate.
Central and Eastern European nations used to made a lot of these fermented vegetables for centuries. It’s very common for us. But we don’t call it kim chi 😉
Thanks so much for this tutorial and recipe! I made kimchi for the first time and feel quite proud of myself 🙂 I’m on day 2 of fermenting, and I’m noticing that as the vegetables expand in the jar, the liquid is no longer covering the vegetables. From what I understand, the vegetables have to be submerged in the liquid so that mold doesn’t form – but I did not save any brine. Can I use plain water (filtered) to cover the vegetables and keep them submerged?
On another note – it was so fascinating to open the jars today and see the bubbling happening inside! Amazing. (that’s a good thing, right?)
Thanks so much for any advice!
Hi Mia, you can cover it with plain water. Make sure to place a small plate over the veggies with a weight on top to make sure it all stays submerged. That’s great that you made this, you should be proud of yourself 🙂
My mom would make cucumber kimchi, and the best part were the stems and leaves! She would slice the cucumbers into quarters almost down the the greens so the pieces would still be attached…
How about making a fermented ice cold beverage? I use a pineapple except the top. Cut it into 4-8 chunks with skin) eat some of the friut if you like and put the rest in a container filled with water. Add cloves and cinnamon for flavor, cover and leave at room temperature for 48 hours. Remove the feemented pineapple chunks and dispose after 48 hours, serve the liquid into a glass, add ice and sweetener if desired and enjoy!
I spent some time in Korea when my husband was in the military and grew totally addicted to Kimchi in all its forms. Umun is the name for the side dishes. My son particularly likes a form made with dried squid and honey. You can julienne daikon and make another popular type. Sweet cucumber kimchee is made pretty much the same way, but before you serve it you can sprinkle it with sushi vinegar, add sugar to the original mix and leave out the hot pepper (or add it). You can also make an awesome salad dressing with garlic, soy sauce, sweet rice wine vinegar, shallots, sesame oil and sesame seeds. We made friends with a couple who own a Korean restaurant and our kids have grown up eating it. When kids are sick sometimes the cucumber kimchee and rice can settle their stomachs (at least ours). They also put Asian pears (grated) in their kimchee recipes.
Thanks for the tips. I too experimented and failed a lot because I couldn’t get used to the whole it’s-supposed-to-ferment idea.
After it sits out and ferments, could I seal the jars (like you would with traditional jarring) and have it stay longer? Also, should I seal the jars tightly while they sit out or loosely so the gas can escape? I don’t want exploding jars of kimchi 😉
Soshana, you can can the kimchee, but it will loose a lot of it’s health benefits when you put it in the boiling water. We usually put our fermented goods in jars with a tight lid and put it in the refrigerator. That slows down the fermentation process.
Thanks! That’s what I was wondering! Wouldn’t want to kill all that wonderful bacteria 🙂 I’m using plain mason jars, should I open them periodically to let out the gas? Sorry about all the questions, this is my first kimchi making endeavor
You know, I don’t know Shoshana. We usually only make a jar at a time and we opened it to eat it so frequently that if any gas did build up, we let it out. However I don’t think you have to worry about an explosion, unless you left it in there for a year or more!
Thanks, I mean while it sits on the counter during the initial fermentation.
Good article
Thanks for the recipe