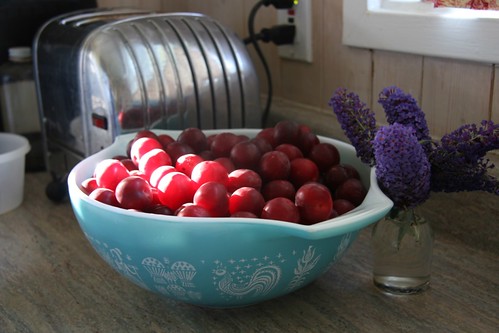
Today’s task is to give jam making a try. If you haven’t done it before, I highly recommend starting with plums, specifically cherry plums. I don’t know if it’s just a California Bay Area thing, but they grow all over the place as landscape trees and the fruit usually falls to the ground and just makes a big smushy mess on the sidewalk. I won’t lie to you, the fruit itself isn’t all that spectacular. It’s not to say that I don’t usually eat a handful each spring, but I definitely wouldn’t pay for them. However since they grow so prolifically we can get them for free. In fact one grows just on the other side of our fence and the cherry plums fall right onto our lawn. It has become the task of our little boys over the years to pick them all up.
Last year Scott made about 14 jars worth of jam from them ( you can read all about it here) and we still have some left, but being that we had bowls upon bowls full on the counter, I decided to give my own jam making skills a run for it’s money and make a few jars myself. Making plum jam is easy, fail proof really. So if you are new to jam making, this is the one to start with. We have an entire season full of fruit to get ready for, so starting out the year with this easy jam will boost your jam making confidence.
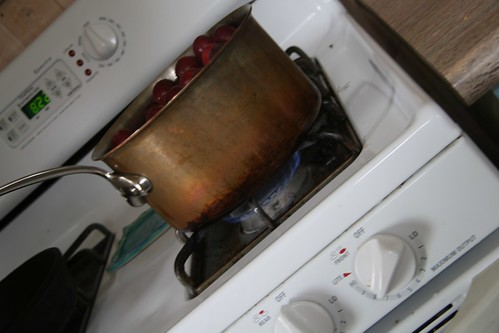
I started by rinsing off a pot full of cherry plums and putting it over medium-high heat. I pressed down on them with our mash potato press to squish each cherry plum. Over the corse of 10 minutes or so, I pretty much had a smooshed liquid on my hands. I set the timer for 20 minutes and let it bubble away.

After 20 minutes, I strained the cherry plum mixture through a strainer into a new pot to get out the skins and seeds. I had to stir and press the mixture, with a heat proof spatula, through the seive to get liquid through. Copious amounts of liquid can come out of those cherry plums skins, so keep smooshing and stirring either until it all comes out or until you get tired.
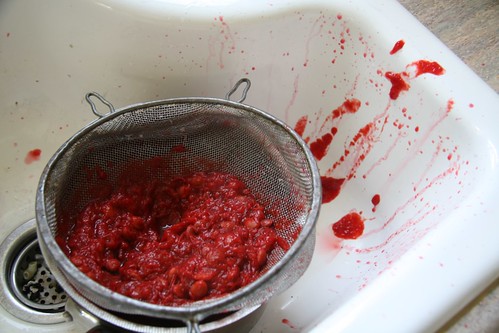
Then I put this new pot onto the stove and let it come up to a boil. After it started boiling I turned the heat down to a healthy simmer and added 2 cups of sugar. If I were you, I’d start with 1 cup and taste it before adding any more. Cherry plums can range in sweetness as do your taste buds, so how much sugar (or honey) you add is variable.

Next, let it simmer away for about, 1.5 to 2 hours until it reaches a good jam like consistency. The beauty of plums is that they contain a natural pectin so you don’t have to add any extra. All you need to do is let it reduce down and it will automatically jell. Keep in mind that when you cool the jam down it will become firmer, so I recommend taking a little bit in a bowl and cooling it down in the fridge to check the consistancy if you think you are getting close.
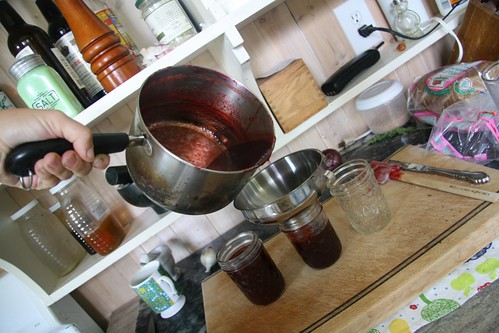
When you have reached the perfect jamming point, pour into clean canning jars, cover and let cool. I’ll be keeping these in the fridge instead of canning them.
I hope you try this, it is easy, frugal, fun and a confidence booster!
P.S. I made it into the June issue of Woman’s Day, check it out next time you are at the grocery store!




Congratulations on making in to Woman’s Day. That’s awesome! I did some cherry plum jam last year and threw in a few peppers a la Live Green, Wear Black. Delicious.
Oh, I have one of these trees in my backyard. Sometimes the kids eat the fruit, but I’ll ask them for some and we’ll make jam. Thank you. BTW I linked to you from a freedom gardens comment. I am always trying to glean wisdom from others who may be from Central California as I learn to grow food. I’ll be reading some of your archives.
ooooh, you’re reading my mind again… I’ve wanted to learn how to can. I have loads of blackberries and apples that go to waste each year and will freeze some but not all. So, this year, I’m having my mom come over and help me make blackberry jam and applesauce. I’m SO excited!
and WOW, Congrats on the mag mention!! That really is so cool!!
Carrie – the BEST applesauce I have ever had requires no cooking. Simply freeze your apples until they are solid. Then take them out and let them defrost. They’ll get mushy. You can actually ‘squeeze’ the skins off! So squeeze away saving the ‘juice’ that runs off. When all skins are off (of course you can use a peeler if necessary), just cut the apples in half to remove the core, throw them into a food processor and process to the thickness and/or chunkiness you prefer. I add cinnamon to mine – to taste. Remember you can mix apple types, even mix in other fruit. When done, label and store in the freezer. This applesauce has the most authentic flavor and can even be used in cooking – like pork tenderloin or meatloaf! Good luck!
DB
Do you store In freezer in glass jars
Big congratulations on the magazine article. That’s terrific! BTW the neighbors plums this year are not nearly as prolific as last. I took it for granted we would have them forever but I’ll enjoy the few I get. It looks like yours are still coming on strong.
rock on sister! Nice article. I want to see that article next time we get together. Again – you continue to amaze me!
Can this jam be a freezer jam?? I have OOODLES of these in my yard and I’m anxious to do something with them. I’m very timid about canning, mainly because I don’t know how so I opt for doing the freezer jam.
Congrats on the mag .article. I’ll definately be using your recipe.
Thanks for the cool information. I’m heading off to pick from our cherry plum trees and give this a try, as soon as I finishing typing this note!
Rob
Hi There, I have just picked a load of cherry plums and have now decided to make jam with them. It was a battle to see who got the most, the birds or me! So I googles plum jam and low and behold there you were. Your article was really good and I shall pass it on to friends. Thank you
Sorry, I meant to say , I am in Kent in U.K. so you may be interested to know how far your tips have travelled.
i am new to jam making but have obtained a fair amount of ripe
cherry plum fruit thanks to the tree in my back garden any advice welcome
Tonight I discovered that what I thought was an ornamental cherry tree in my backyard is actually a plum cherry tree.. armed with a newly found fortune in cherry plums, i did a little research, and came across your blog. it’s lovely and inspiring, so thank you. in addition to trying my hand at jam, i think i’m going to make a plum cherry simple syrup to mix into vodka or gin cocktails…
Made some for the first time last year, added cinnamon to the second batch and it was fabulous. Great with Pork. 2nd Year, here we go.
Two great cherry plum recipes here http://www.wellbeingmagazine.co.uk/article/cherry-plum-recipes
I’m loving the plum and rosemary jelly…yum!
Just made a batch with our Cherry plums, mine are a yellow variety. Turned out very yummy I used an equal amount of sugar to fruit. http://madquilter.blogspot.com/2011/01/its-jamming-and-saucing-season.html
Love all the cherry plum recipes.I made a low sugar jam with the cherry plums and used green cardamom seeds (smashed), cinnamon sticks, allspice and peppercorns. I think I will skip the low sugar pectin which made it like jello and add sugar next time. The spices were a nice addition though.
You can make this sauce below I found . . . Just make a Asian Burrito filler using Pork or Chicken cooked and diced, with maybe diced onions, bok choy diced, carrots diced, garlic 2 tsp, etc(Improvise or do a search) Then wrap that filler into a Lettuce leaf like a taco, then dip it into the newly made Plum Sauce! Yummy!!! You will never use these for jelly much if you taste the plum sauce hurry!!!
Chinese Plum Sauce:
Makes about 3 pints.
Prep Time: 15 minutes
Cook Time: 1 hour
• 3 pounds plums
• 4 garlic cloves, chopped
• 1 large shallot, chopped
• 2 tablespoons chopped ginger
• 1/4 cup soy sauce
• 2 tablespoons chile bean paste
• 2 teaspoons Five Spice Powder
• 1/2 cup rice vinegar
• 1 cup sugar
__________
1. You will need to pit the plums sooner or later. If you are using domestic, freestone plums, cut them in half and pop out the pit. Most plums, however, have fruit that sticks to the pit. In this case, you can do one of three things: Use a cherry pitter to remove the pits; slice and cook, then strain; or freeze the plums whole to soften, then cook and strain. Freezing loosens the fruit’s grip on the pit. Either way you will need some way to strain the pulp from the pits. I use a simple food mill.
2. I cook the plums in two stages. In the first stage, I put just a little water in the bottom of a heavy pot and add all the plums. Turn the heat to medium and, once they are simmering a little, use a potato masher to squash them as they cook. Keep agitating the plums as you simmer them gently — you will probably need to turn the heat down at some point — until most of the flesh comes off the pits. This takes about 20 to 35 minutes.
3. Move all the plums to a food mill. Pick out as many pits as you can right off the bat. Mill the plums into a coarse puree, removing pits as you go. This is actually really easy with domestic plums, as both the pit and the plum itself is larger than its wild cousin. Wild plums are only about the size of a large cherry, so this stage will take a bit longer with them.
4. Once the cooked plums are free of pits, return them to the pot along with all the other ingredients. Simmer gently for another 30 minutes, until all the flavors are melded and the garlic, shallot and ginger have softened. Pour everything in to a blender and puree until smooth.
5. Your plum sauce is now ready, and it will keep for about 6 months in a sealed jar in the fridge. If you want to keep it in the pantry, you will need to water-bath can it. Use clean jars and new lids and process for 15 minutes. My advice is to use half-pint jars, as a little of this sauce goes a long way. Once canned, the plum sauce will keep for a year or so in the pantry.
Just used this recipe with much success! I kept the jam a little tart but I think it will be delish with butter and fresh bread
Thank you for the guidance.
Hi! I made this cherry plum jam many years ago from your blog and it was fantastic! I came back a while ago to check for it because I wanted to make it again, and it looked like the link didn’t work. I was bummed! I am glad your blog is up again to share things like this delightful recipe. Cheers!