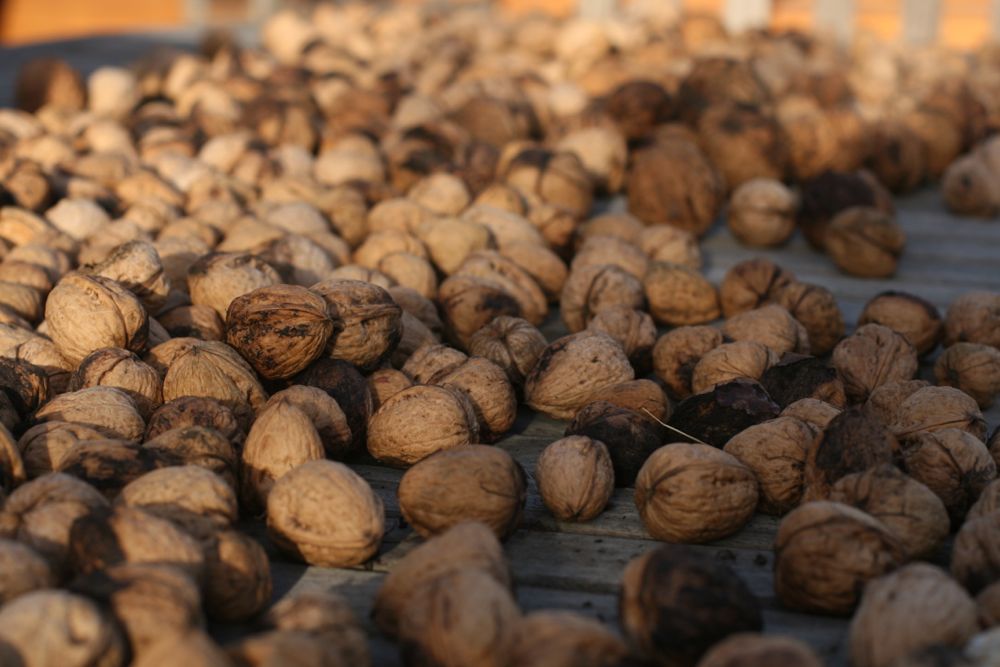
My goodness, yet again the walnut harvest is under way. This year is our fourth year as walnut harvesters. Meaning that we are the lucky recipients of four very healthy English Walnut trees, which provide us about six grocery bags full of walnuts each year. That’s a lot of walnuts for one family, let me tell you. We seem to be in the habit of collecting them each fall, letting them cure for their two required weeks out in the open air (so they don’t mold in storage), then storing them in grocery bags and cracking them sporadically as needed. But once early fall comes upon us and the deadline of a new harvest weighs upon us, we crack with gusto. We set up a table under the maple tree, pour a glass of wine and make it almost a late afternoon habit of cracking last years walnuts for an hour or so. It makes a nice ending to the day and it’s a welcome way to usher in autumn. For both Scott and I, it became a somewhat secret mission to figure out how to crack the walnuts in a way that each half would come out whole. It’s not easy. The previous years we’d load up our freezer bags full of well chopped up nuts, only because it’s really challenging to get them out in one whole piece and easy to get them out in little bits and pieces. This year, through our somewhat meditative wine drinking walnut cracking habit we strived for better results. After much practice, we’ve figured out the best way to get the vast majority of halves out whole.
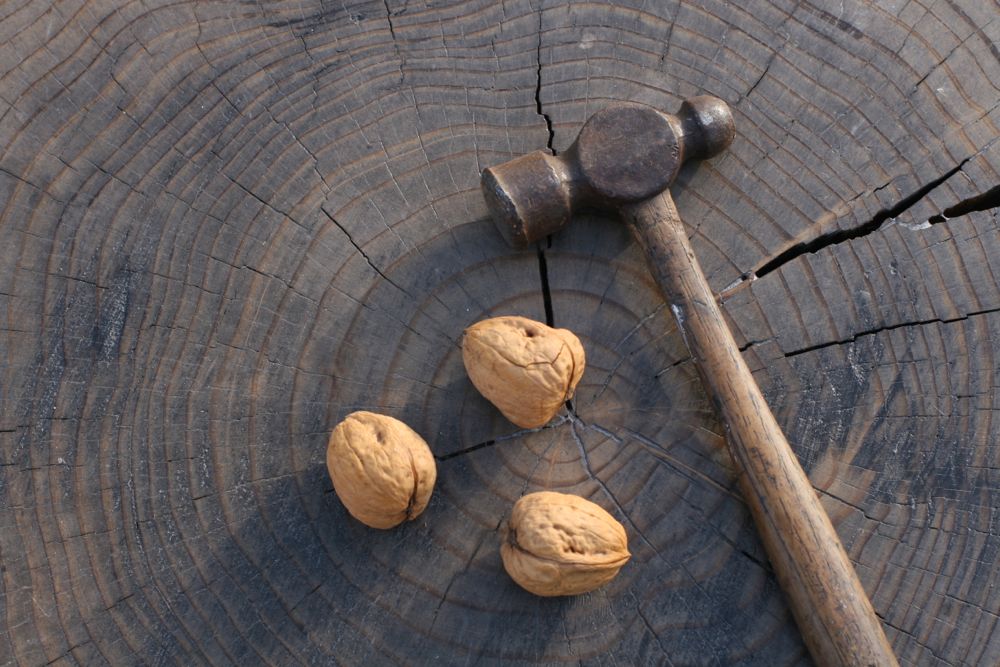
In the rare instance that you too have a walnut tree, or happen to buy your walnuts whole, this is how we arrived at the best chances for harvesting your walnuts in whole halves.
- Crack your walnut with three firm taps on the seamless side of the walnut.
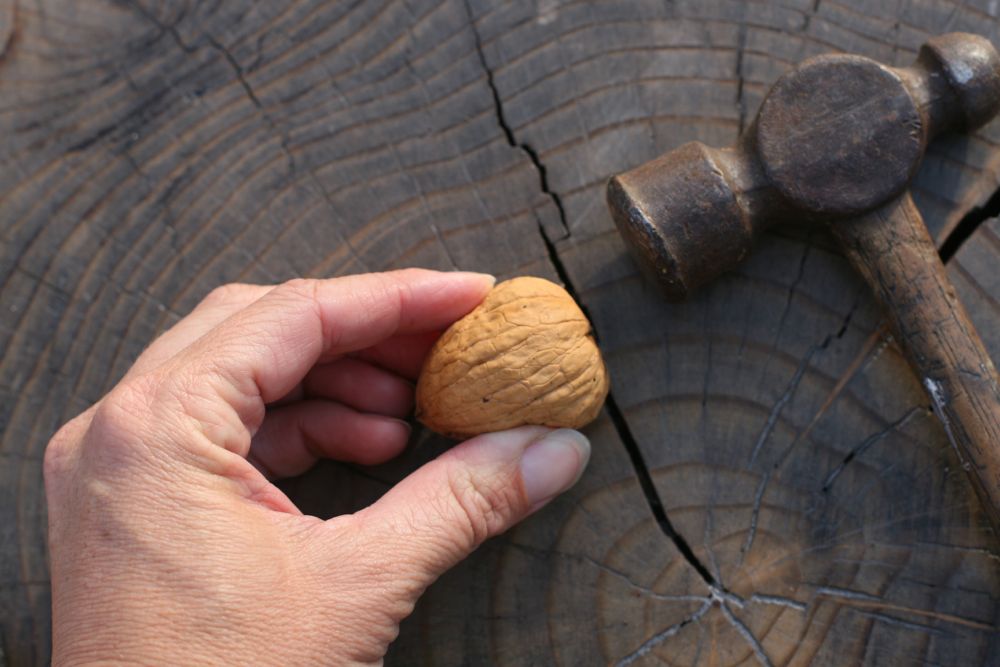
2. Turn the walnut up, so the pointy side is sky facing, and again give three firm taps on the point.
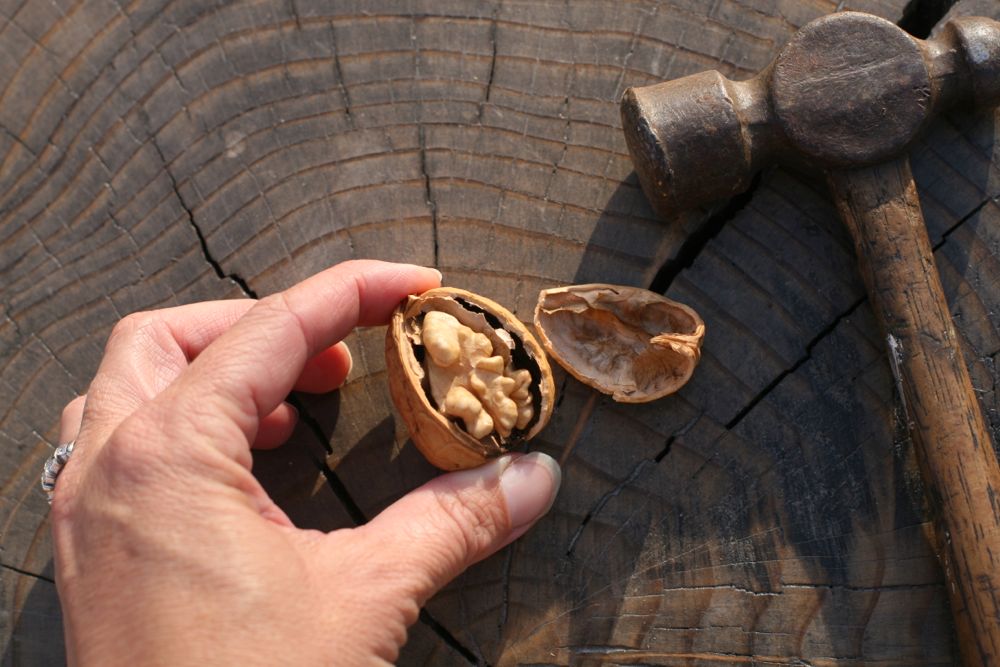
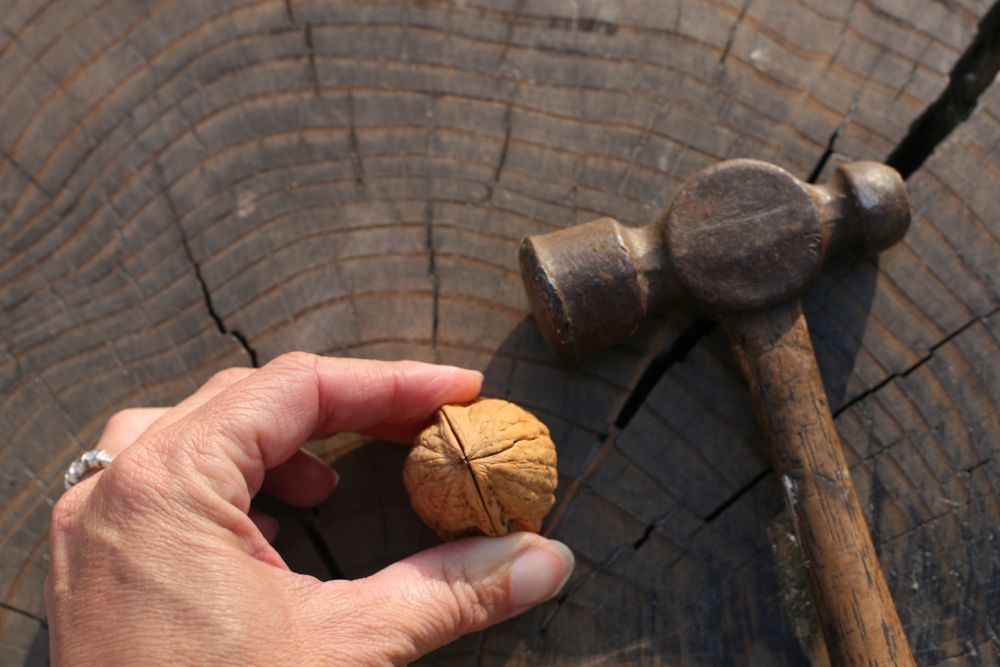
3. Carefully pull away the shell and gently pull the walnut halves out.
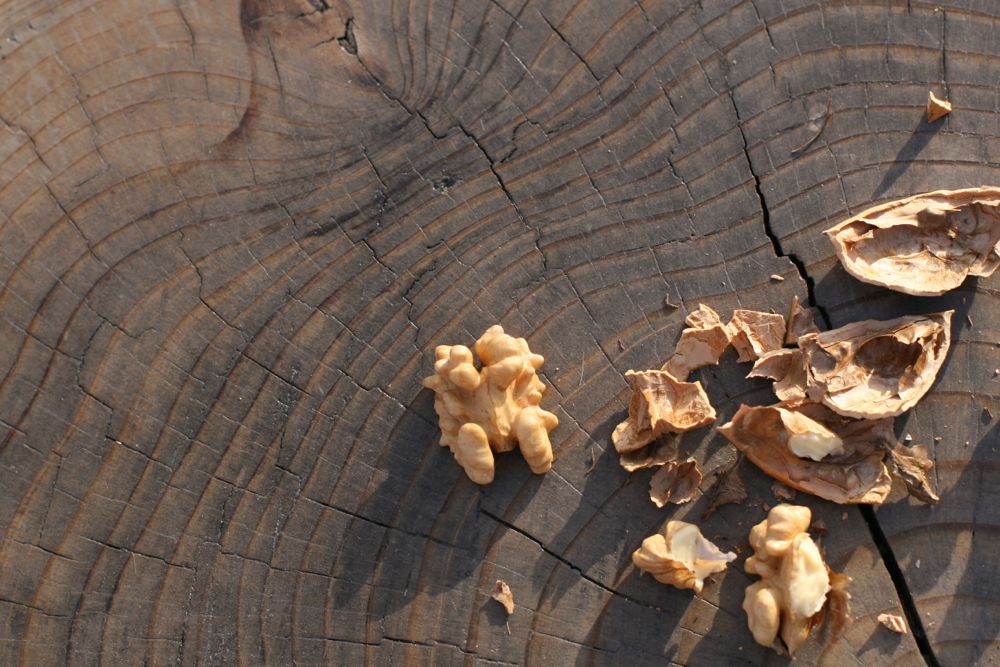
4. With a little bit of luck and practice, you should be able to get the majority of your walnut halves out in whole pieces.
 Good luck and let us know how it goes!


Yay. There is someone in our area just on the outskirts of town that has bags of walnuts “free to a good home”. I never really knew what to do with them ie. letting them cure, or cracking for that matter. Thanks. I am going to take him up on his offer. Thanks for the post Kendra. Happy Fall!
Be sure that you dry the nuts in an oven on low before getting to the meat. You do not need to have a commercial dryer that is used for bulk producers.
Do you suspect this method works for pecans as well? Definitely worth a try–thanks for the tips.
BTW I love your cracking surface.
We like to crack English Walnuts, Godfather-style. 😉 In our neck of the woods, black walnuts are everywhere, and once the outer hull (full of inky, brown-staining goo) is removed, you’re left with a walnut that has thick, hard shell that takes a stick of dynamite to open 🙂
I love my black walnuts and I have a method for opening them that involves a small vice attached to my coffee table (I do this while watching TV), a flat tip screw driver and a hammer. Insert the well dried nut into the vice with the pointy end up and the seams aligned to take all the pressure of the squeeze. Wrap your hand around the nut to contain the debris and then crank the vice til it cracks. The weak spot is that pointed tip as you’ll discover if you observe how the squirrels get into them. The screw driver and hammer are just for back up. Its a slow messy business but watching TV passes the time.
Living in the midwest, and always having to buy a bag of walnuts to enjoy in the fall, we simply used a nutcracker like this https://tse1.mm.bing.net/th?&id=HN.608035166058972096&w=300&h=300&c=0&pid=1.9&rs=0&p=0
and figured out if we lined the seams of the nut up with the nutcracker (just like the picture of the almond shows), and if we didn’t squeeze TOO hard, we would crack the shell and not the nut itself.
No hammers or stumps required ;>D But we make sure to take some vitamin B6 & B12 ahead of time to protect our already delicate carpal tunnel nerves!
Hi Julie, We have one of those nutcrackers, but it was hurting our hands after a while. The hammer is more cumbersome, but it’s easier on the hands.
I’ve got a bag of walnuts that I foraged for last year still in the garage. I have yet to muster the energy to crack them. I’m keeping my fingers crossed they aren’t totally worm infested….
Melissa, I bet they are okay. Wine. You need a glass of wine to help get you going 🙂
Is there a way to crack them and keep the shelf halves whole, too? I use them in Christmas tree decorations.
Patricia, if you crack the nuts the way I described, there’s a good chance that at least 50% of the time you’ll get a whole shell half too. I’m curious to see how you decorate them for the tree!
Friend of mine taught me to open walnuts using an oyster shucking knife – short,sturdy – by inserting it into the nut at the seam at the top and twisting.
I have an English walnut tree too but it’s so rare that I get a nut I can take a nutmeat from. I really don’t know what I’m doing.
Can you describe how you gather the nuts, extract them from their husks and otherwise prepared them before you’re ready to crack the shells? I’d be so grateful and thanks in advance.
For the last 5 or 6 years I’ve been making nocino in the summer with the immature green nuts ’cause I have no idea how to harvest mature ones. I’ve got more notion than I can use in the rest of my life but it’s the only use I’ve found for my walnuts.
Harvesting black walnuts requires a few tools, you can figure out your own variations on them.
Water impervious gloves – rubber kitchen gloves, thin latex gloves, I’ve even used roofing gloves because they were what I had on hand.
Something weighty to crush the hulls of the black walnuts. I lay them in a line on my dirt driveway and use the car. Other people squeeze them by hand or beat them with a stick. If I only have a couple dozen I just tromp on them with heavy shoes.
A big bucket or two or three. I use some of the big five gallon food type buckets we have around the place.
A long stick, just cut down a sapling of some variety of junk wood. One with knobby bits helps.
A hose and running water. Pick an area to work where the toxins and dyes in the walnuts won’t damage a delicate garden plant or leave an eyesore of a dark patch.
Some sort of drying rack for the cleaned nuts.
I generally lay a tarp under the tree to capture the nuts as they fall out of the tree. The branches are so tall I can no longer reach them. When enough nuts begin falling I go out and gather them. They are often in the grass around the perimeter of the tree, remember they bounce and roll when they fall. I toss them back onto the tarp or casually create communal piles which I then gather up into my buckets.
Do not think you can stash these for a few days til you have enough to bother working with. Those hulls are intended to disintegrate and they will turn into black mush within a couple of days, invariably filled with worms. That stuff seeps into the nutmeat and spoils the taste.
Then I lay the green lemony smelling nuts along the driveway. Mine is dirt so no harm done, and I drive back and forth over them to crush the hulls. Put on the gloves and pick the hard shelled walnuts out of the gunk. Toss them into the buckets. The buckets should be just shy of half-full for the next stage.
Move to your next area with the hose and the stick. Fill your bucket ¾ full with water and use the long knobby stick to stir and beat the nuts. Your aim is to get as much of the pulp off as possible. You will have to do this several times. When the water is black pour it off, add fresh water and do it again. The water will get progressive lighter – black, brown, yellow brown, golden and then pale yellow. When the water is only slightly tinged you’re probably clean enough.
Lay the nuts out to dry. We use old plastic bread racks that allow air to circulate underneath. You can leave them out in the sun for the afternoon but make sure you move them into the house or a shut garage before nightfall. I forgot them one night and the next morning discovered the entire rack had been spirited away in the darkness.
Leave them on the rack to dry for several days. Roll them around occasionally to make sure they are drying well. This year we have put them into re-purposed onion sacks and hung them from hooks to continue drying until I’m ready to crack them.
Then in the slow days of February or March I set up a little vice on my coffee table and spend a couple evenings cracking nuts while watching TV.
Wow, Lisa, thank you for your fantastic Black Walnut picking & harvesting tips.
rainey, that’s a great idea for a post. However to give you quick tips since it’s harvesting season. We go around to each tree once we see that the nuts have started to drop and give it a big shake. Most will fall and then we gather them, one at a time and pull of the hulls. We harvest them once the hulls have split so they are easy to pull off. Then collect the nuts in a bucket. Once we are done for the day, we spread them out on a table or ground to try for two weeks before putting them into grocery bags for storage. Hope that helps!
Yes, it does. But when you say that you store them, are you just storing until you have a need for them or is there some curing time necessary?
Also, if my nutmeats are small and only some of them are tasty does that mean that the tree requires some kind of care? I just found a seedling poking from a nutshell that had split about 15 years ago and put it in the ground in a more convenient place. Now it’s a great shade tree and even provided a swing for my grandson but I’ve never given it any kind of special care.
Thanks so much for the info! I bake far more often than I drink so I’d much rather have the nutmeats than the nocino if I could master the proper care and harvesting.
This is a great article but I have a few questions! We have 2 walnut trees that just started producing. I picked up about 50 walnut and cleaned off the husks but they are still stained black. I left them sitting out for about 2 weeks and cracked one. They are hard to crack but not too bad, the taste was not too appealing to me though. Is 2 weeks long enough? Does the taste mellow after they age? Did I not get them clean enough. This is something I have never done before.
Hi RW, the taste does change slightly with age. It’s not really a matter of cleaning them enough. Sometimes a few of our walnut shells are stained if we don’t pull the husk off soon enough, but the flavor doesn’t vary that much from the shells that are ‘clean’. The taste of walnuts straight out the shell is different than the ones you buy in the store…just like with all produce.
Fresh walnuts with have a different flavour to the store-bought ones due to the skin (the bit next to the white ) which changes the flavour as they ripen. Fresh from the tree the skin will peel off to leave the white nut.
The old (English) verse about collecting walnuts says they should be beaten from the tree using a long pole or stick. There are also pictures (paintings) of walnuts being harvested in this way.
The verse is no longer p.c. or I would have included it.
The family has a latge estate in SW Croatia with small forests of walnuts trees. Gathering and cleaning is well noted in the comments above but I will add a word about our opening methods.
We hang them in net sacks for a year and come June/July we give each family member a sack – about 30kg (about 70 lbs),
The long oudoor picnic table, an old towel to protect the table, a bick on the towel, a tack hammer and three buckets per peson will yield about 20kg per person per day – if the knack is learned quickly.
With a brick it does not matter which end the nut is tapped, the shock of the tap is transmitted through the whole nut.
So; With one end up and the seam held parallel to your body, give a light tap to the top. You will hear a faint crack but will not necessarily see any cracks in the wood shell. The initial tap just opens the seam a little.
A quarter turn to the nut so you are now holding the seam and give it a second tap. If your techinque is right and the force of the tap is right , the wood around the nut will burst into eight parts – four quadrants to each side.
The eight pieces will literally shake off and you have a whole kernel in the hand.
Now the part that requires experience.
There is a woody membrane that runs vertically through the nut and visually the kernel appears as four quadrants (almost like a brain if it were in four pieces). Grab the wood stalk (or the remnants of it) and find the TWO MAIN halves of the kernel. It is difficult at the start to discern, but a tip is where you see a little of the membrane peeking through between two quarters, you have the wrong separation.
Just insert the thumbnail between the two correct halves (from the stem downward) and prise a little. The kernel will split evenly into two perfect halves. One half will retain the membrane. Grab the remnantsof the stem (it shows easily now) and simply slide the membrane up and away from the half kernel. Two lovely half walnut kernels!
A couple of hints;
– tap too hard and the nut will collapse and crush the kernel into lots of itsy-bitsy pieces. A light tack hammer is the way to go.
– if you hold the seam in your fingers for the first tap, you will likely pinch the skin on your fingers painfully.
– if you dont hear a faint crack on the tap, the wood has not broken. You did not tap hard enough. Tap again.
The wall nutter.
The idea is very good, I do it the same way although I give some taps on both side of the walnut. If it where possible I would show you some photos. I have 18 walnut trees.